Classic Banana Pudding Recipe
Real banana pudding is a cooked custard, not a powder whisked into cold milk. That single difference is why the homemade version tastes like vanilla and egg yolk instead of tasting like vanilla flavoring, and why it holds a clean edge when you spoon it out of the dish.
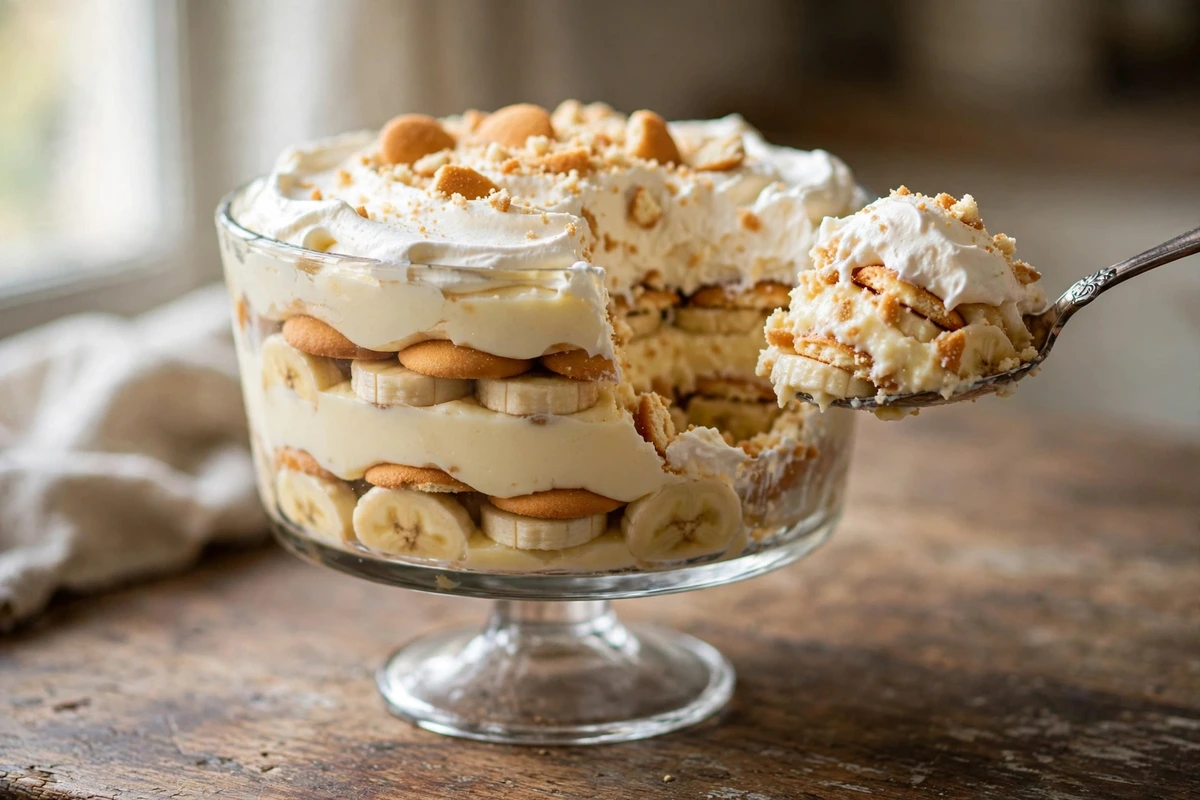
The version below is the old Southern one: stovetop custard, vanilla wafers, ripe bananas, four hours in the fridge. It takes about forty minutes of actual work.
Why You'll Love This Recipe
- The custard is thickened with flour and egg yolks, so it sets soft and sliceable rather than gummy the way boxed mixes can go.
- Bananas stay pale and creamy for two full days when you layer them the way described below.
- It has to be made ahead, which makes it one of the easiest things to bring to a potluck or serve after a big meal.
- Nothing in it is fussy. No water bath, no baking, no candy thermometer required.
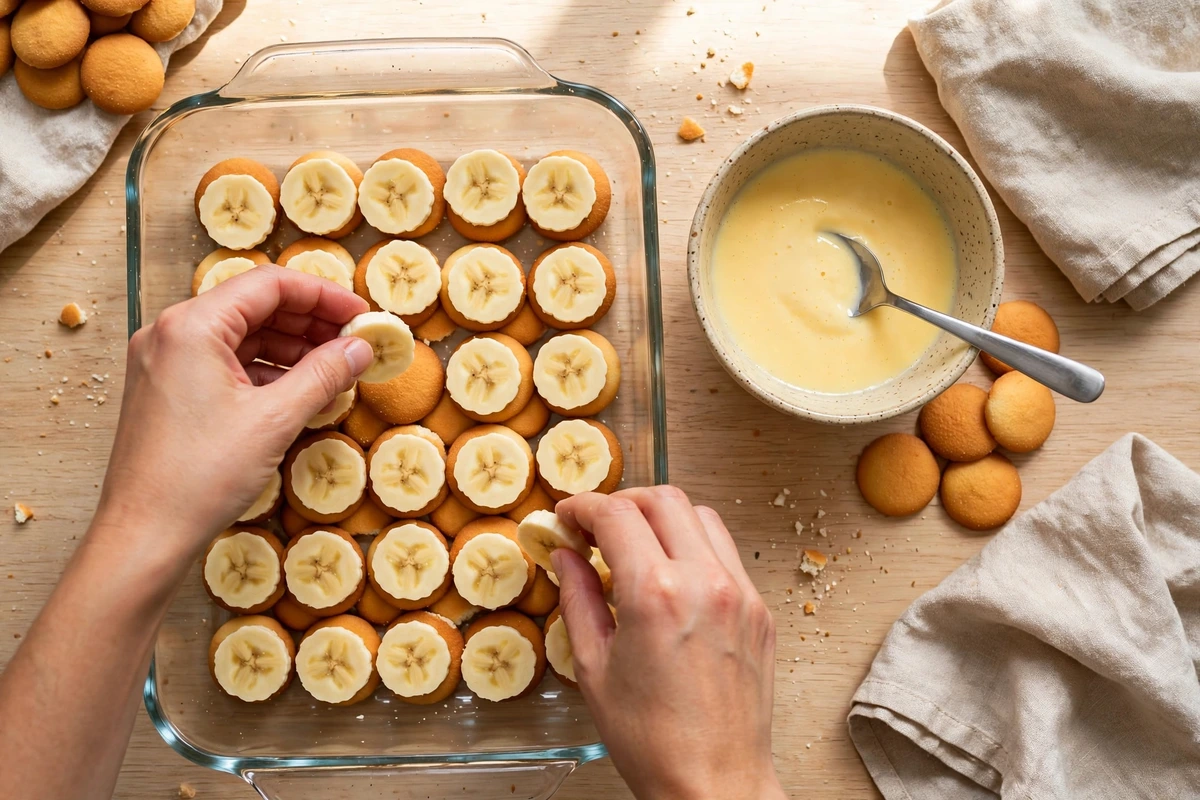
Bananas brown because of oxygen, not because of time. Enzymes in the cut flesh react with air, and anything that blocks air blocks the browning. So instead of tossing the slices in lemon juice and changing the flavor, bury them. Lay the slices in a single layer, edges touching, then spoon custard over the top and nudge it into every gap with the back of the spoon until no banana is showing. Sealed under custard, the slices stay pale for two days. Any slice poking above the surface will be brown by morning.
Read Before You Start
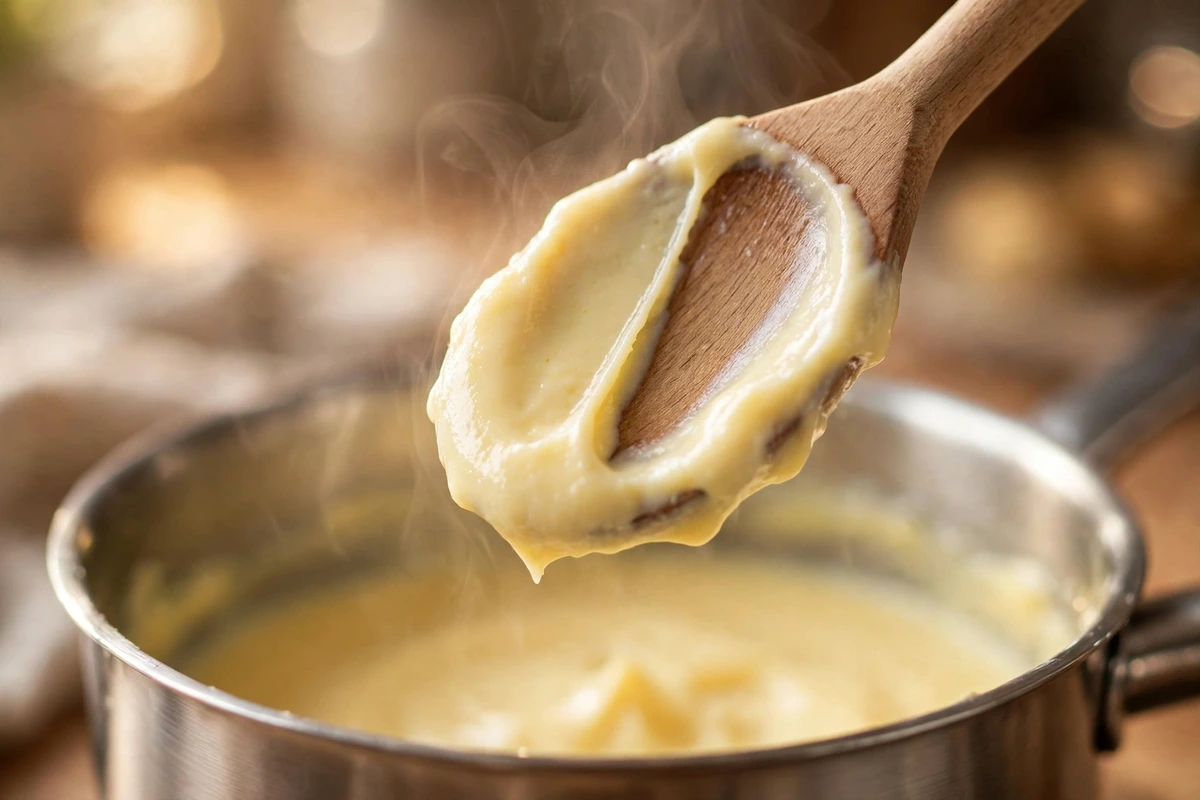
Cook the custard past the first bubble. Flour-thickened custard looks finished before it is. If you pull it the moment it thickens, the starch has not fully gelatinized and the pudding loosens again in the fridge overnight. It needs to reach a slow, lazy boil and hold there.
Buy your bananas two or three days early. You want peels that are fully yellow with a light freckling of brown, not heavily spotted. Heavily spotted bananas are sweeter but they collapse into mush against warm custard, and they are the main reason people end up with a watery layer at the bottom of the dish.
Ingredient Deep Dive & Notes
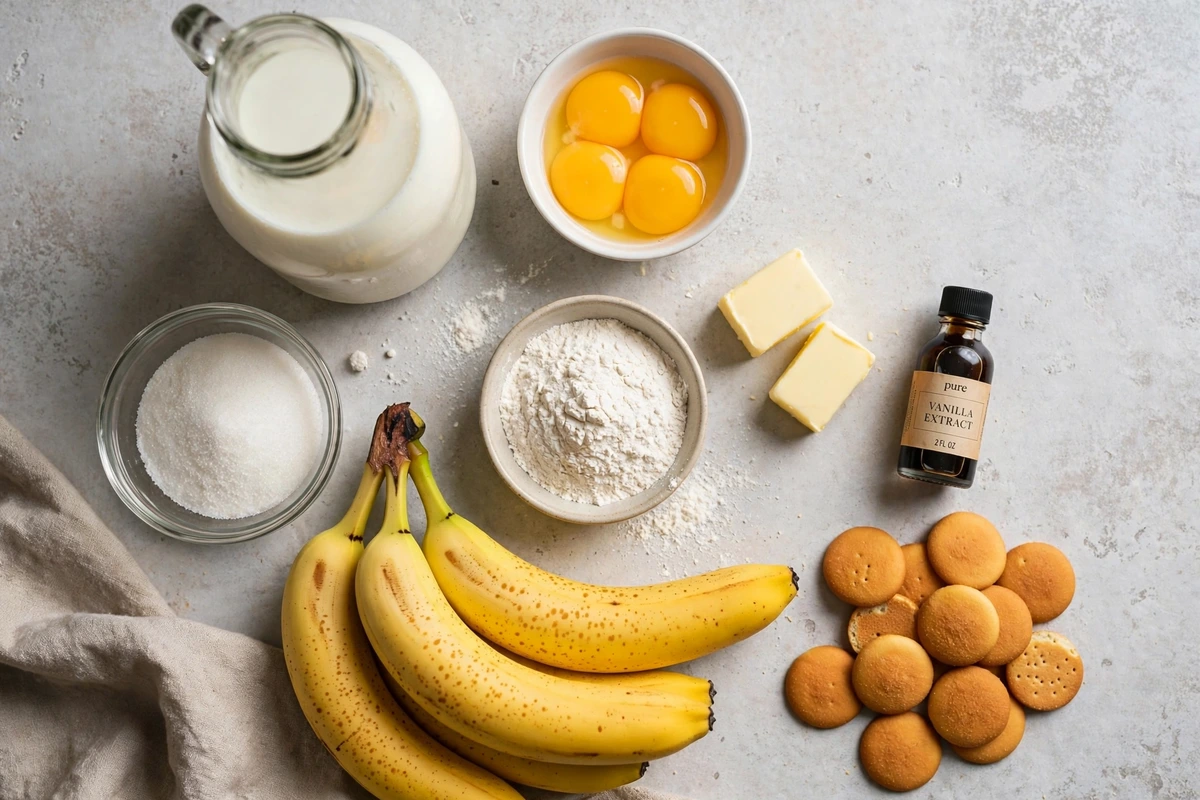
Whole milk. Three cups. The fat carries the vanilla and gives the custard body. Two percent works and tastes noticeably thinner. Skim does not set well here.
Egg yolks. Four large. These are the difference between banana pudding and sweetened milk paste. They add richness and help the custard hold a shape.
All-purpose flour. One third cup. Old Southern recipes use flour rather than cornstarch, and there is a reason worth knowing: flour sets to a softer, more spoonable texture, while cornstarch sets firmer and can turn slightly slick. Flour also tolerates the extra minute of boiling that the yolks need.
Granulated sugar. Three quarters cup in the custard. The wafers and bananas bring plenty of sweetness on their own, so resist adding more.
Butter. Two tablespoons, stirred in off the heat. It smooths the finished custard and adds a little gloss.
Vanilla extract. Two teaspoons, added off the heat so the flavor does not cook off. Use an alcohol-free vanilla extract to keep the recipe halal-friendly. Standard extracts are alcohol-based.
Vanilla wafers. About eleven ounces, roughly sixty cookies. Check the label if halal status matters to you, since wafer brands vary. The cookies are supposed to soften into a cake-like layer, so do not reach for a sturdier biscuit hoping they stay crisp.
Bananas. Four medium, yellow with light freckling. Slice them a generous quarter inch thick. Thin slices disappear into the custard.
Do not substitute the egg yolks. You can swap the flour, the milk fat, and the topping, but the yolks are what make this taste like real banana pudding instead of a shortcut. Leaving them out gives you a starch glue with no depth.
For more ripe banana uses, see [Related recipe: Banana Bread, link once published] and [Related recipe: Moist Banana Muffins, link once published].
Equipment Needed
- Heavy-bottomed 3-quart saucepan. A thin pan scorches milk custard at the edges before the center thickens.
- Flat whisk or a wooden spoon. A flat whisk reaches the corner where the pan wall meets the base, which is exactly where custard sticks.
- Fine mesh strainer. Cheap insurance against lumps and cooked egg specks.
- A 2.5 to 3 quart glass dish or trifle bowl. Glass lets you see the layers, which is half the appeal.
- Instant-read thermometer, optional but useful.
Detailed Step-by-Step Cooking Guide
Preparation & Setup
Whisk the dry base with the milk
Cook until it boils, then keep going
Temper the yolks, the step most people skip properly
Finish off the heat and cool 10 minutes
Layer the dish
Press and chill at least 4 hours
Top just before serving
Kitchen Process & Plating Gallery
Getting the Texture Right
Almost always undercooking. Flour-thickened custard has to boil, not just thicken. If you have already chilled it and it is loose, you cannot rescue the assembled dish, but you can scoop it into bowls and serve it as a soft pudding parfait while you make a note for next time.
The flour went into liquid that was already warm, or the whisking stopped. Straining catches it after the fact.
Overripe bananas released it. Use yellow, lightly freckled fruit next time.
That minute of boiling got skipped, so raw flour is still in there. Nothing fixes it later.
Plastic wrap was not touching the surface. Peel it off and top with whipped cream as planned.
How to Use This Custard
How to Serve, Store & Reheat
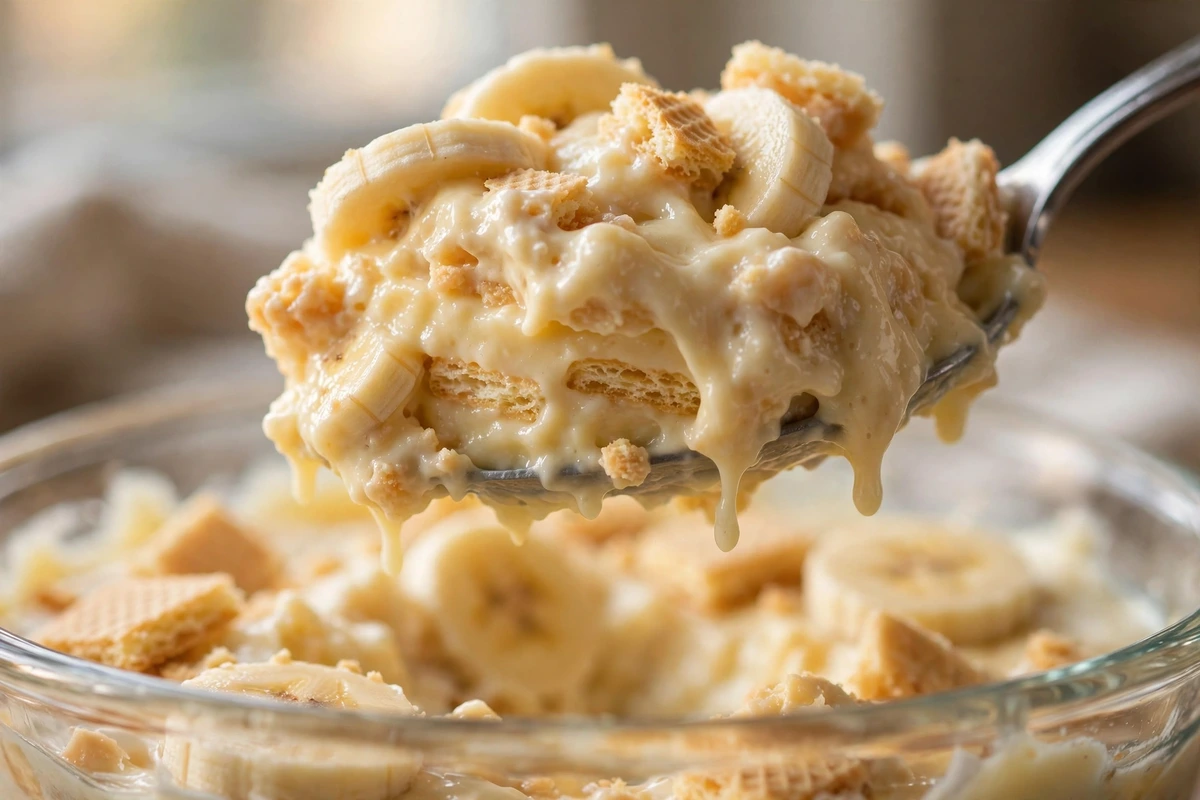
Serve cold, straight from the fridge, in shallow bowls so everyone gets all three layers. A trifle bowl shows the layers better than a 9x13 pan if you are bringing it somewhere.
Cover and refrigerate up to 3 days. Quality peaks between hours 4 and 24. By day three the wafers have gone fully soft and the bananas near any exposed edge start to darken, though it still tastes good.
No. This is a cold dessert and warming it breaks the custard.
No. Freezing splits the custard and turns the banana slices watery and grey when thawed. There is no workaround worth the disappointment.
Dietary Variations & Adaptations
Full-fat canned coconut milk in place of whole milk, coconut oil in place of butter, and coconut whipped cream on top. The coconut flavor is present, not hidden, so treat it as a different dessert rather than a copy.
Swap in gluten-free vanilla wafer cookies and use two and a half tablespoons of cornstarch in place of the flour. Cornstarch needs less boiling, about 30 seconds at a bubble, and sets a touch firmer.
“Two numbers explain almost every banana pudding that goes wrong. Wheat starch needs to reach roughly 203°F to fully gelatinize, which in practice means an actual boil, not "thick enough." Egg yolks start to set around 149°F and scramble above about 180°F. Those two facts pull in opposite directions, and the flour is what resolves the conflict: starch molecules physically get between the egg proteins and slow them down, which is why a flour custard can be boiled for a minute with yolks in it when a plain egg custard would curdle instantly. So boil the base hard before the yolks go in, then keep it gentle after. That order is the entire technique. Recipe Timing Prep Time 25 minutes Cook Time 15 minutes Rest Time 4 hours 10 minutes (10 minute custard cool + 4 hour chill) Total Time 4 hours 50 minutes <a id="recipe-card"></a>”
Allergen Notice: This recipe contains milk, eggs and wheat. Vanilla wafers may also contain soy. Substitutions: coconut milk and coconut oil for the dairy, gluten-free wafers and cornstarch for the wheat. The eggs cannot be removed without changing what the dish is. Ingredient formulations differ between brands and change over time, so read labels yourself if you are cooking for someone with an allergy. Nothing here should be treated as safe for a specific allergy on my word.
Frequently Asked Questions
Recipe Card & Steps
Ingredients Checklist
Click an item to check it off as you prep
- 3 (150 g) granulated sugar
- 1 (40 g) all-purpose flour
- 1 fine salt
- 3 (720 ml) whole milk
- 4 large egg yolks
- 2 (28 g) unsalted butter
- 2 alcohol-free vanilla extract
- 11 (about 60) vanilla wafer cookies
- 4 medium ripe bananas, yellow with light freckling, sliced 1/4 inch thick
- 1 (360 ml) cold heavy cream
- 3 powdered sugar
- 5 vanilla wafers, crushed, for garnish
Step-by-Step Instructions
Follow along and mark each step complete as you cook
Whisk the sugar, flour and salt together in a cold 3-quart heavy-bottomed saucepan. Pour in the milk in a slow stream, whisking constantly until smooth.
Set over medium heat. Whisk steadily, scraping the corners of the pan, for 8 to 10 minutes until the mixture thickens and coats the back of a spoon. Continue until slow bubbles break the surface, then cook at that lazy bubble for 1 full minute.
Whisk the egg yolks smooth in a bowl. Ladle about 1 cup of the hot custard into the yolks in a thin stream while whisking constantly, then pour the mixture back into the saucepan.
Cook over medium-low, whisking constantly, for 2 minutes more, until the custard mounds on a spoon and a finger drawn through it leaves a line that holds, about 180°F.
Remove from the heat. Stir in the butter until melted, then the vanilla. Pour through a fine mesh strainer into a bowl and let cool 10 minutes.
Spread a thin smear of custard across the base of a 2.5 to 3 quart dish. Add a single layer of vanilla wafers, sides touching, breaking cookies to fill gaps. Top with a single layer of banana slices.
Spoon over one third of the custard, working it into every gap until no banana is visible. Repeat the wafer, banana and custard layers twice more, finishing with custard.
Press plastic wrap directly onto the custard surface. Refrigerate at least 4 hours or overnight.
Before serving, whip the cold cream with the powdered sugar to soft peaks. Spread over the pudding and scatter the crushed wafers on top.
Recipe Card Notes & Tips
You Might Also Enjoy
More delicious kitchen-tested dishes in Desserts.