Moist Chocolate Cake Recipe
Dry chocolate cake is almost never a bad recipe. It is a cup of flour that was scooped instead of weighed, or a cake pulled ten minutes late because the toothpick came out bone dry. This one uses oil instead of butter, buttermilk instead of milk, and hot coffee stirred in at the very end, which gives you a crumb that is still soft on day three.
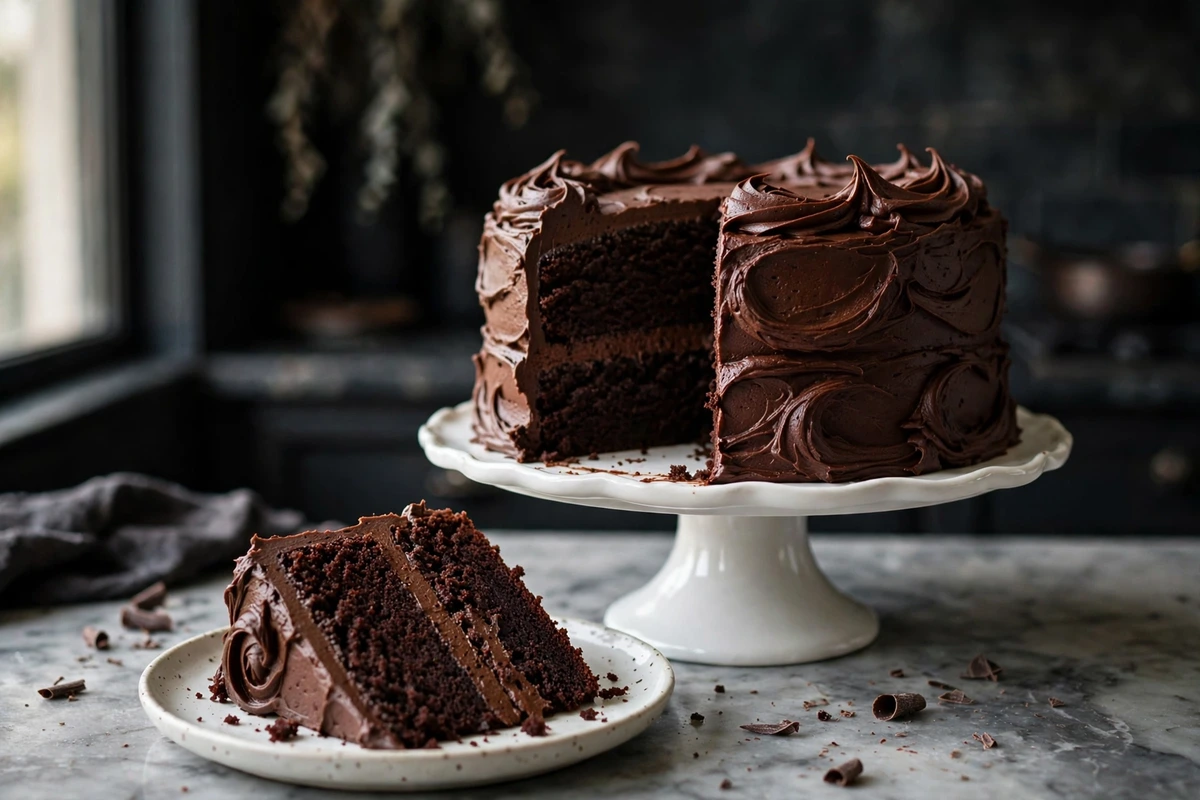
Two 9-inch layers, one bowl for the batter, about two hours from start to sliced.
Why You'll Love This Recipe
- The batter comes together in one bowl with a whisk. No creaming, no stand mixer, no waiting for butter to soften.
- Oil keeps it soft straight out of the fridge, which butter-based cakes simply do not do.
- Every doneness cue is a number or a visual, so you are not guessing at 30 minutes with the oven door open.
- It scales into cupcakes, a sheet cake, or a three-layer birthday cake without changing the recipe.
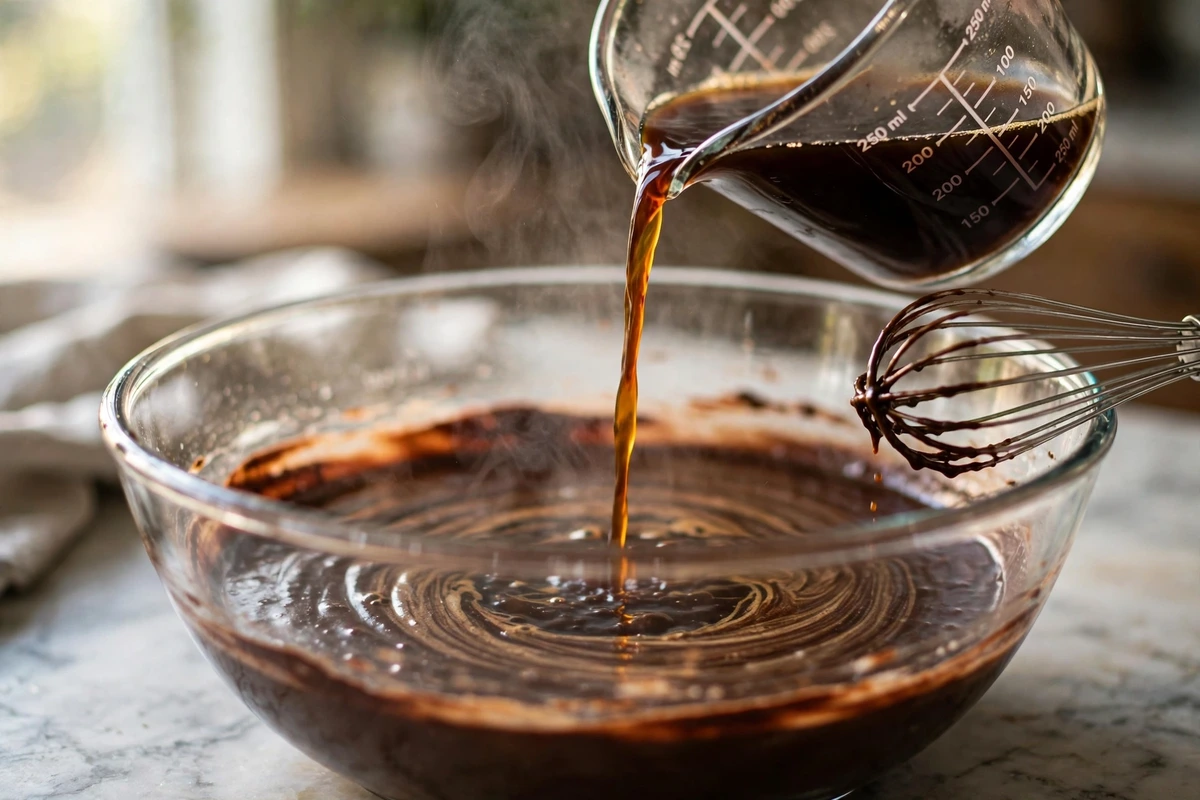
Add the hot coffee last, and add it hot enough to steam. Cocoa powder holds flavour compounds that only release properly in hot liquid, so blooming it in the finished batter deepens the chocolate far more than adding extra cocoa does. Here's the thing: the batter will look alarmingly thin, almost like drinking chocolate. That is correct. Do not add flour to thicken it, or you will undo the whole point.
Read Before You Start
Weigh the flour, or spoon it into the cup and level it off. Dipping the measuring cup straight into the bag packs in noticeably more flour than the recipe intends, sometimes 20 percent more. That single habit ruins more chocolate cakes than any oven problem. If you own a scale, use 220 g and stop thinking about it.
Room temperature eggs and buttermilk matter here. Cold dairy hitting oil gives you a broken-looking batter that bakes into a tighter, heavier crumb. Take both out 30 minutes ahead, or sit the sealed buttermilk container in warm tap water for 10 minutes.
Ingredient Deep Dive & Notes
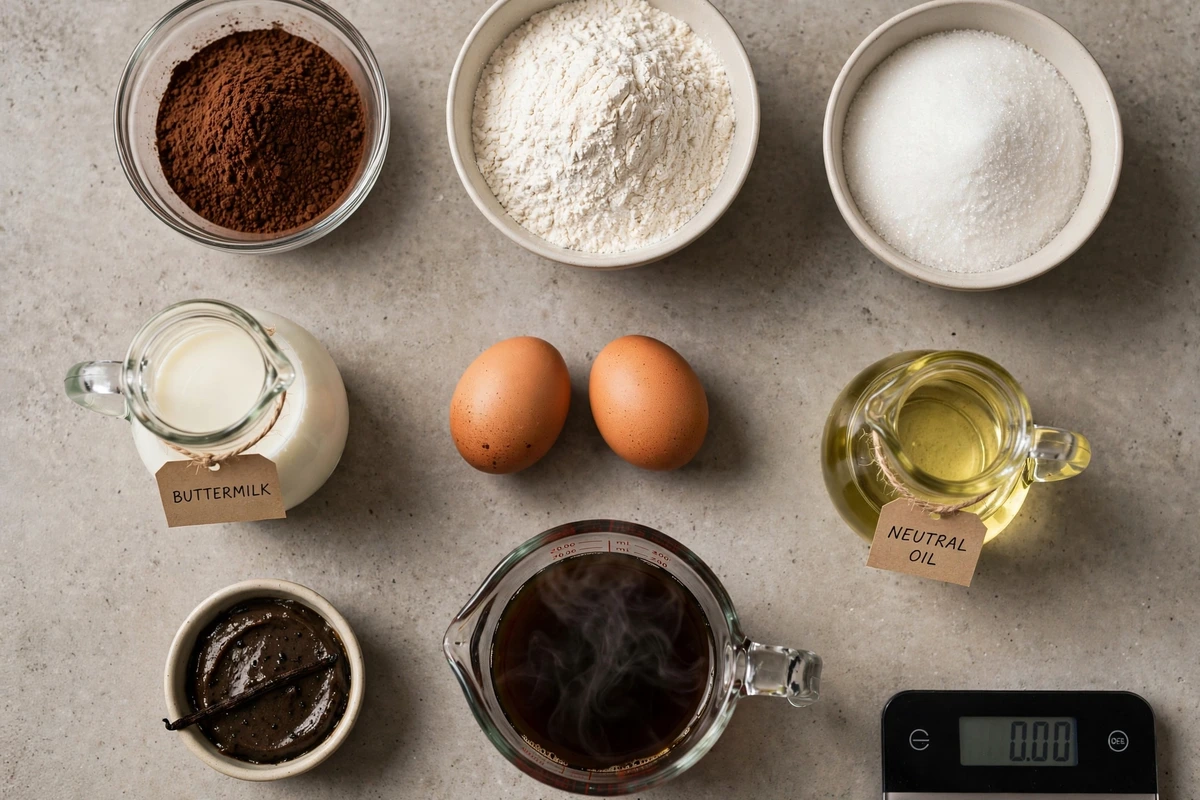
Natural unsweetened cocoa powder. Natural cocoa is acidic and lighter in colour, and its acidity reacts with the baking soda for lift. Dutch-process cocoa is darker and smoother tasting, and it still works in this recipe because the buttermilk supplies enough acid on its own. Expect a slightly darker, less tangy cake with Dutch.
Buttermilk. Two jobs: the acid tenderizes the gluten strands so the crumb stays soft, and it reacts with the baking soda. If you have none, stir 1 tablespoon of lemon juice or white vinegar into 1 cup of milk and let it sit 10 minutes.
Neutral oil. This is the moisture insurance and the one thing not to substitute. Butter is 15 to 20 percent water and turns solid at fridge temperature, which is exactly why butter cakes feel dry and firm on day two. Oil stays liquid, so the crumb stays soft.
Sugar. It is doing more than sweetening. Sugar attracts and holds water in the crumb, so cutting it below about 1 1/2 cups gives you a drier, more open cake. Reduce it if you want, but know the trade.
Eggs, at room temperature. Structure and richness. Two large eggs is the right amount for two 9-inch layers; a third makes the crumb noticeably more rubbery.
Alcohol-free vanilla. Standard vanilla extract is made with alcohol. Use alcohol-free extract, vanilla bean paste, or vanilla powder if that matters for your kitchen. Flavour difference is minimal in a baked cake.
Hot brewed coffee. It will not make the cake taste like coffee at this quantity. Coffee's bitterness sharpens the perception of cocoa. Hot water works and still blooms the cocoa; you just lose a little depth.
For the frosting, see [Related recipe: Chocolate Buttercream Frosting — link once published], or use the version in the recipe card below.
Equipment Needed
- Two 9-inch round cake pans in light-coloured metal. Dark nonstick pans absorb more heat and over-brown the edges before the center sets.
- Parchment rounds cut to fit the pan bases. Grease alone is not reliable with a batter this wet.
- A digital scale, if you have one. This recipe is far more forgiving when the flour is weighed.
- An instant-read thermometer, which turns doneness from a guess into a reading.
- An offset spatula for frosting.
Detailed Step-by-Step Cooking Guide
Preparation & Setup
1. Prepare the pans and oven
2. Whisk the dry ingredients
3. Add the wet ingredients
4. Stir in the hot coffee
5. Divide the batter by weight
6. Bake and test properly
7. Cool completely, then frost
Kitchen Process & Plating Gallery
Getting the Crumb Right
Overmeasured flour or overbaking, in that order. A cake left in for an extra eight minutes loses a lot of moisture, and the skewer test encourages exactly that mistake because a clean skewer means dry. Check at 32 minutes.
Usually the oven door opened before the structure set, or the leavening was old. Baking soda and powder lose strength after roughly six months open. Test the powder by dropping half a teaspoon into hot water: no active fizzing means replace it.
The oven ran hot. Most home ovens are off by 15 to 25 degrees, and an oven thermometer is a cheap fix. A small dome is normal and gets levelled off before stacking.
Overmixing after the flour went in, or ingredients that were too cold to emulsify. Mix until just combined and no further.
Skipped parchment, or turned out too early. Ten minutes in the pan is the sweet spot: long enough to firm up, short enough that the steam has not glued it down.
How to Use This Cake Base
How to Serve, Store & Reheat
Serve at room temperature. Cold cake tastes muted because the fat is firm and the aromatic compounds do not carry, so pull refrigerated slices 30 minutes early. A pinch of flaky salt on the frosting sharpens the chocolate noticeably.
Frosted and covered at cool room temperature, it keeps for 3 days. In the fridge, up to 5 days in an airtight container, though the crumb tightens slightly when chilled. Unfrosted layers wrapped in plastic hold at room temperature for 2 days.
Yes for individual slices. Fifteen seconds in the microwave brings a fridge-cold slice back to soft, and the frosting goes glossy. Do not reheat a whole frosted cake.
Yes, and it freezes unusually well. Cool the layers completely, wrap each in plastic and then foil, and freeze for up to 3 months. Thaw wrapped at room temperature for about 3 hours, which keeps the condensation on the wrapping instead of the cake. Frosted slices freeze for up to 1 month.
Dietary Variations & Adaptations
replace the buttermilk with 1 cup unsweetened soy or oat milk plus 1 tablespoon lemon juice, rested 10 minutes. Frost with a plant-based butter buttercream. Oat milk gives the closest crumb.
use 1/2 cup unsweetened applesauce in place of the two eggs. The cake bakes slightly denser and more fudgy, and needs an extra 3 to 5 minutes.
a 1:1 gluten-free baking blend containing xanthan gum swaps in by weight. Let the batter rest 20 minutes before baking so the starches hydrate, which prevents grittiness. Full method in [Related recipe: Gluten Free Chocolate Cake — link once published].
“Recipe Timing Prep: 25 minutes (includes making the frosting while the layers cool) Cook: 35 minutes Rest / cooling: 70 minutes (10 minutes in the pans plus 60 minutes on the rack) Total: 2 hours 10 minutes”
Allergen Notice: This chocolate cake contains wheat (all-purpose flour), milk (buttermilk, butter and cream in the frosting), and egg. Wheat: use the gluten-free blend swap above. Milk: use the dairy-free swaps above for both cake and frosting. Egg: use the applesauce swap above. Product formulations differ between brands and countries, so read the label on everything you use, including cocoa powder and baking blends, which can carry cross-contamination warnings. This is general guidance and not a claim that any version of this recipe is safe for a specific allergy.
Frequently Asked Questions
Recipe Card & Steps
Ingredients Checklist
Click an item to check it off as you prep
- 1 (220 g) all-purpose flour, spooned and levelled
- 3 (65 g) natural unsweetened cocoa powder
- 1 (350 g) granulated sugar
- 1 baking powder
- 1 baking soda
- 1 fine sea salt
- 2 large eggs, room temperature
- 1 (240 ml) buttermilk, room temperature
- 1 (120 ml) neutral oil
- 2 alcohol-free vanilla extract or vanilla bean paste
- 1 (240 ml) hot brewed coffee, or hot water
- 1 (226 g) unsalted butter, softened
- 3 (360 g) powdered sugar, sifted
- 3 (65 g) unsweetened cocoa powder, sifted
- 1 fine sea salt
- 1 alcohol-free vanilla extract
- 4 to 6 tablespoons heavy cream or whole milk
Step-by-Step Instructions
Follow along and mark each step complete as you cook
Heat the oven to 350°F (175°C) with a rack in the center. Grease two 9-inch round pans, line the bases with parchment rounds, and grease the parchment.
Whisk the flour, cocoa, sugar, baking powder, baking soda, and salt in a large bowl for 30 seconds, breaking up any cocoa lumps.
Add the eggs, buttermilk, oil, and vanilla. Whisk for about 60 seconds, until smooth and uniformly dark with no dry flour at the bottom of the bowl.
Pour in the hot coffee and stir slowly until just combined. The batter will be very thin. Do not add flour.
Divide the batter evenly between the pans, about 670 g in each.
Bake for 32 to 35 minutes, until the top springs back under light pressure, the edges pull slightly from the pan, and a skewer in the center comes out with a few moist crumbs. The center should read 205°F to 210°F (96°C to 99°C).
Cool in the pans for 10 minutes. Turn out onto a wire rack, peel off the parchment, and cool completely, at least 1 hour.
For the frosting, beat the butter for 2 minutes until pale and creamy. Add the powdered sugar, cocoa, and salt in two additions on low speed. Add the vanilla and 4 tablespoons of cream, then beat on medium-high for 2 minutes, adding more cream a tablespoon at a time until it holds a soft peak and spreads easily.
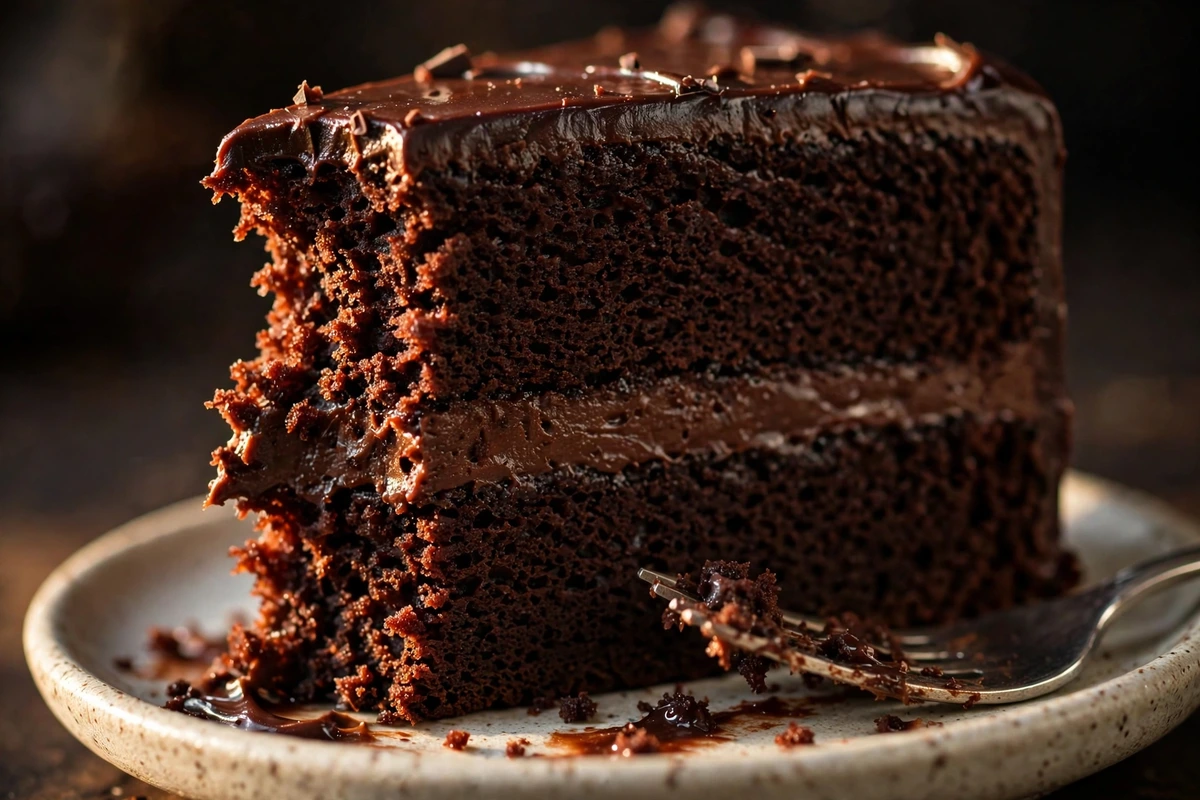
Level any dome with a serrated knife. Stack the layers with frosting between them, then coat the top and sides. Rest 15 minutes before slicing for cleaner cuts.
Recipe Card Notes & Tips
You Might Also Enjoy
More delicious kitchen-tested dishes in Desserts.