Easy Peppermint Bark Recipe
Most peppermint bark fails in the same place, and it isn't the melting. You cut into it, and the white layer lifts clean off the dark one like a sticker. The fix has nothing to do with the ingredients you buy and everything to do with a ten minute window between the two layers.
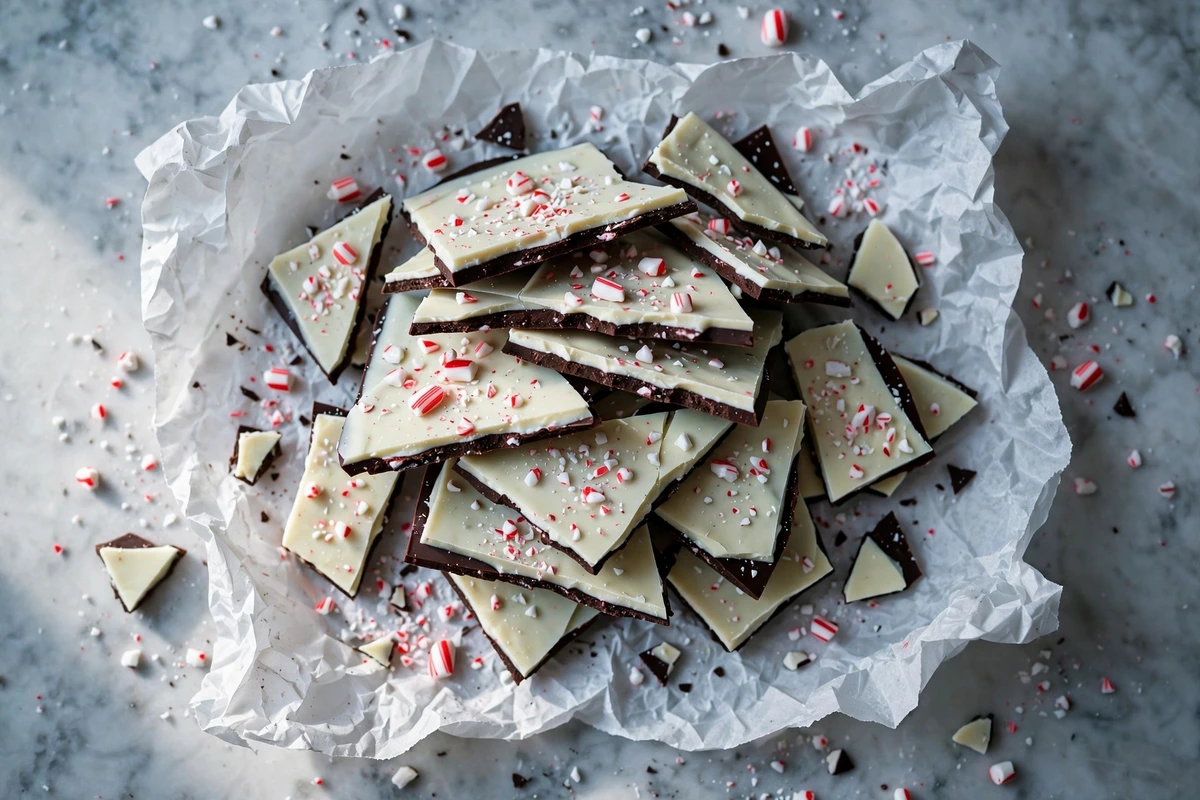
This version uses three ingredients, no candy thermometer, and no tempering. What it does ask for is that you stop chilling the first layer until it's rock hard, because that's exactly what causes the split.
Why You'll Love This Recipe
- Three ingredients, one pan, no baking and no thermometer
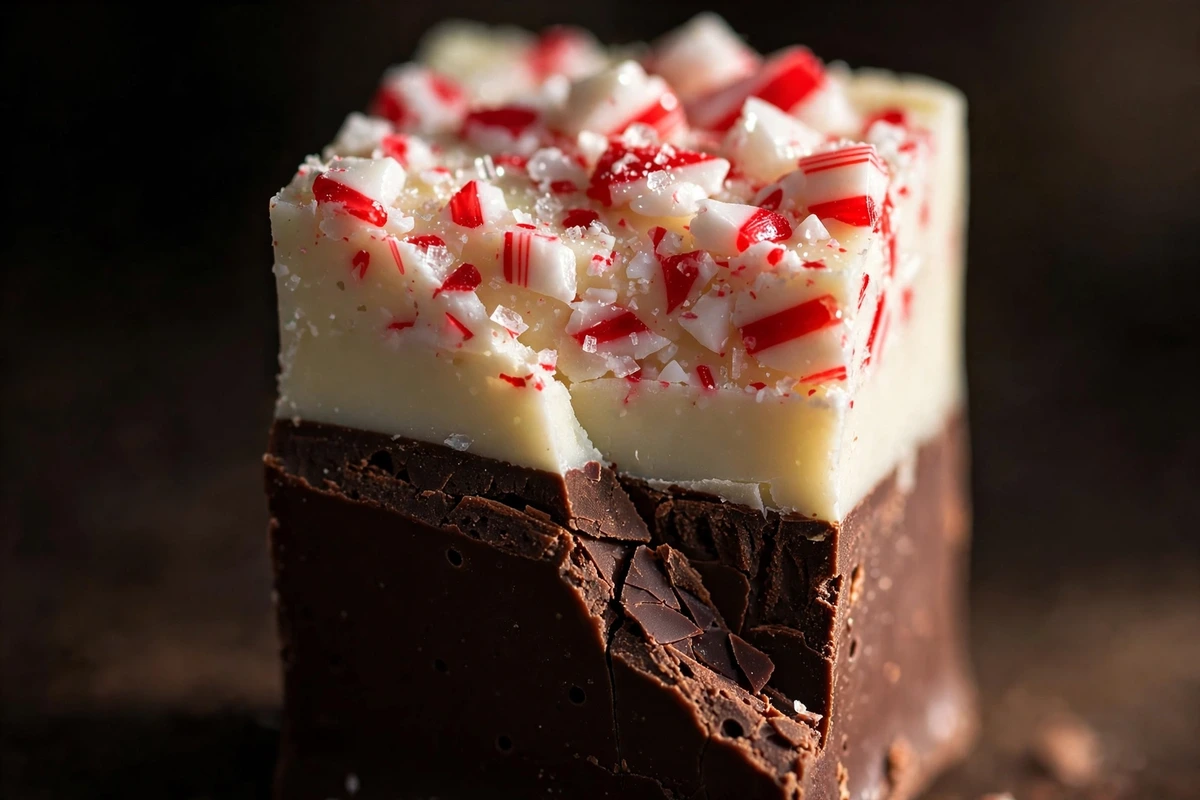
- The layers actually stay fused, so you can cut it into clean gift-box pieces instead of rubble
- It keeps for three weeks at cool room temperature, which makes it the first thing you can cross off a December list
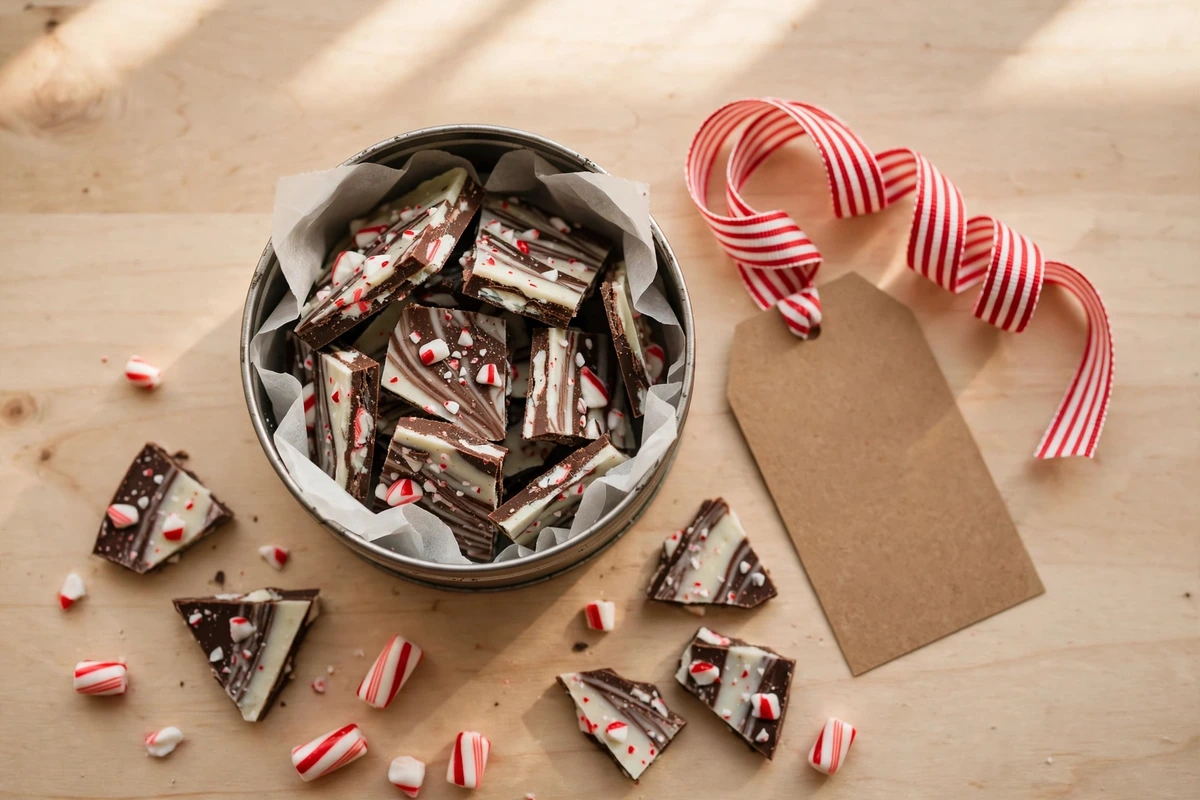
- One batch fills two small gift tins with enough left over for the cookie tray
Pour the white chocolate when the dark layer is set but still slightly tacky, not when it's hard. Press the back of a clean finger against the dark chocolate after about ten minutes at room temperature. If it feels cool and leaves no smudge on your finger but still has a faint grip to it, that's the window. Fully hardened chocolate is a release surface, which is why refrigerated layers slide apart. Tacky chocolate is a bonding surface, and the two layers fuse into one slab.
Read Before You Start
Chop the chocolate smaller than feels necessary. Pieces around the size of a pea melt evenly. Large chunks sit in the middle of the bowl still solid, which tempts you to run the microwave longer, and white chocolate starts to scorch around 110°F. Pull the bowl when roughly 70% has melted and stir the rest through with residual heat.
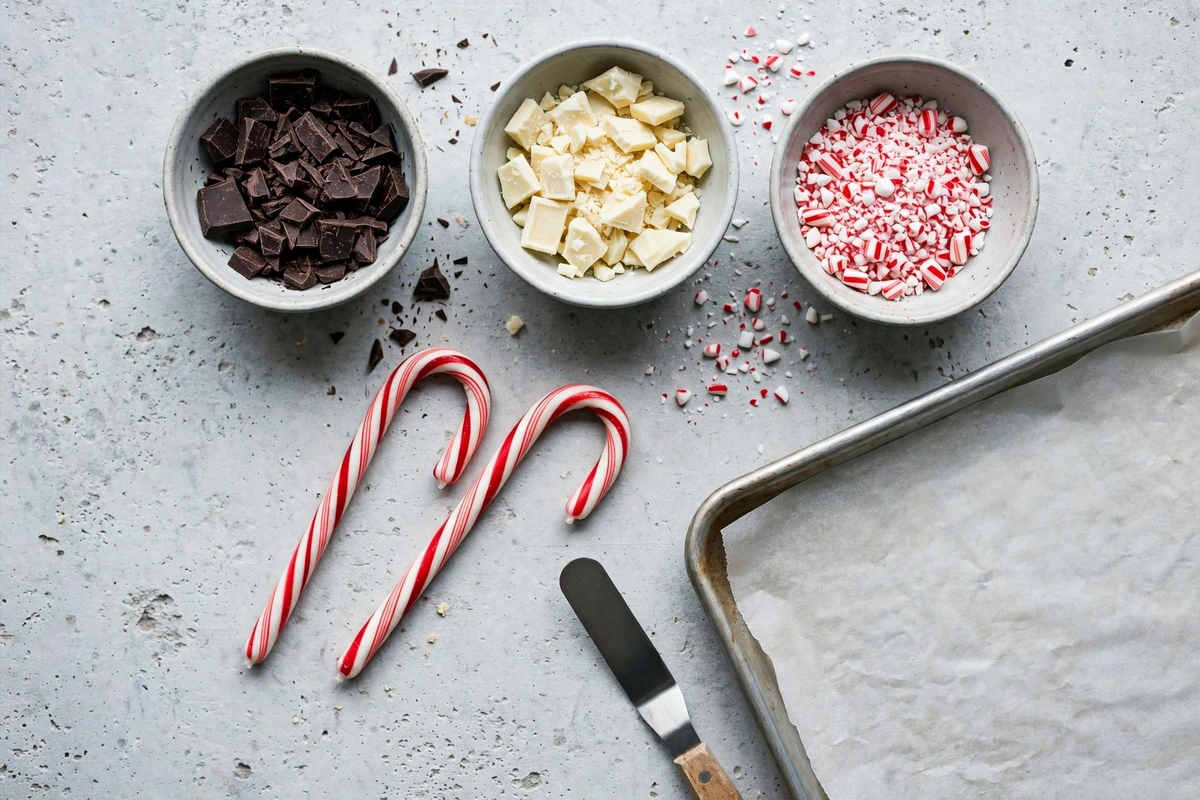
Crush the candy canes into two grades, not one. You want a fine powder and pea-sized shards in the same bowl. The powder sinks slightly into the wet white chocolate and tints the surface pink at the edges. The shards stay proud and give you the crunch. A lot of recipes tell you to sift the dust out, which throws away half the flavour.
Ingredient Deep Dive & Notes
Dark or semisweet chocolate (12 oz / 340g). Buy bar chocolate or callets rather than chips if you can. Chips contain stabilisers that help them hold their shape in a cookie, which is the opposite of what you want in something that has to flow into a thin even sheet. Semisweet gives you the classic candy-cane contrast. Bittersweet at 60% to 70% makes the peppermint read sharper and less sweet.
White chocolate (12 oz / 340g). Check that cocoa butter appears on the label. Products made with palm or vegetable fat instead will set, but they set waxy and taste flat under the peppermint. This is the one ingredient in a peppermint bark recipe where the cheap version is genuinely obvious in the finished piece.
Candy canes (about 5 standard canes, roughly 1/2 cup crushed). These carry all the peppermint flavour in the default recipe. Standard canes are sugar, corn syrup, peppermint oil and colouring. Some novelty or specialty canes use carmine colouring or a confectioner's glaze, so check the label if that matters for your kitchen.
Don't substitute: peppermint extract for the candy canes without switching to peppermint oil. Extract is alcohol and water based, and water is what makes melted chocolate seize into a stiff paste. If you want stronger mint, use 1/4 teaspoon of oil-based peppermint flavouring stirred into the white chocolate, not extract.
Equipment Needed
- Quarter sheet pan or 9x13 inch pan, lined with parchment that overhangs two sides
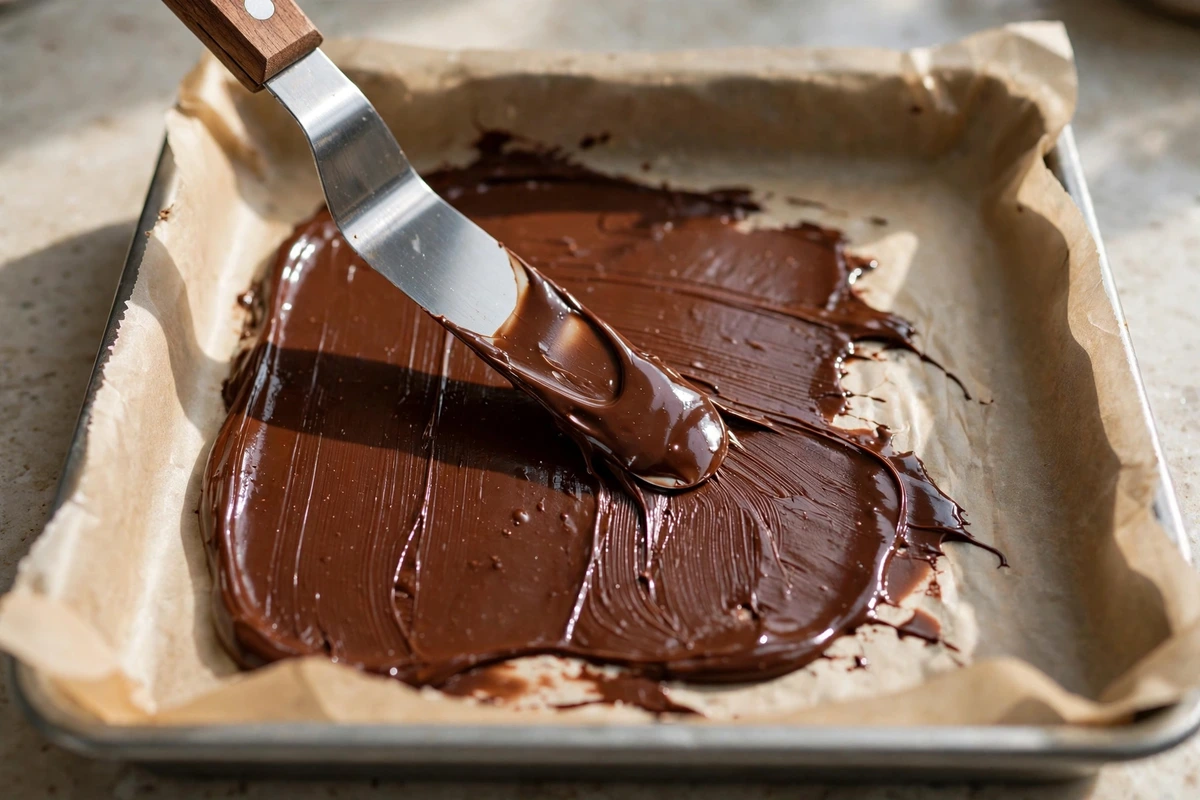
- Small offset spatula, which spreads a thin layer far better than a spoon
- Zip-top bag and a rolling pin for the candy canes, since a food processor turns them almost entirely to dust
- Instant-read thermometer, optional, but it tells you whether your white chocolate is under 105°F instead of making you guess
Detailed Step-by-Step Cooking Guide
Preparation & Setup
Prep the pan and the candy canes
Melt the dark chocolate
Spread the base layer
The step most people skip
Melt the white chocolate
Pour, spread, and top immediately
Set and break
Kitchen Process & Plating Gallery
Getting the Snap Right
Either the room is too warm or the layers are too thick. Chocolate sets firm below about 68°F. If your kitchen sits warmer than that, chill the finished slab for 15 minutes and then bring it back to room temperature before breaking, which is different from setting it in the fridge from the start.
That's bloom, and it's cosmetic rather than spoilage. Fat bloom comes from the cocoa butter recrystallising, usually after a temperature swing. Sugar bloom comes from condensation, which is exactly what happens when a cold pan hits warm kitchen air. Setting on the counter instead of in the fridge avoids most of it.
It either got too hot or a drop of water got in. Both are fixable to a point: stir in a teaspoon of neutral oil off the heat and it will usually loosen back to a spreadable consistency, though the final set stays slightly softer.
Sugar pulls moisture out of the air. Airtight storage solves it, and so does keeping the peppermint on the surface rather than stirred through the chocolate, where it would draw moisture from the inside out.
How to Use This Bark
How to Serve, Store & Reheat
Break into shards and pile them on a board or in a shallow bowl. Take it out of storage about 10 minutes before serving. Straight from a cold cupboard the flavour reads muted, and the peppermint opens up as it warms slightly.
Airtight container at cool room temperature, with parchment between the layers so pieces don't fuse back together. Three weeks is realistic. The chocolate lasts longer than that, but the candy canes gradually soften.
Not applicable, and worth saying plainly: don't try to re-melt and re-set a batch you're unhappy with. Remelted bark loses its snap and the candy cane pieces dissolve into pink streaks.
Yes, up to three months, wrapped tightly in a double layer. The important part is the thaw. Move it to the fridge overnight first, then to the counter, still sealed, until it reaches room temperature. Unwrapping a frozen slab in a warm kitchen puts condensation directly on the surface and dissolves the candy canes into sticky patches.
Dietary Variations & Adaptations
Use a dairy-free dark chocolate and an oat or rice based white chocolate alternative. The dark layer behaves identically. The white alternative sets noticeably softer, so give it an extra 15 minutes and store it cooler.
Use 70% dark for the base and cut the white chocolate to 8 oz, spread thinner. The ratio shift makes a real difference, more than switching brands does.
Crushed hard peppermint discs work exactly the same way. For a sugar-free version, sugar-free peppermints crush finer and tend to clump, so crush them just before scattering.
“The fridge causes most peppermint bark problems rather than solving them. Chocolate sets perfectly well at cool room temperature, and it sets better there: slower crystallisation gives a firmer snap and a glossier surface. What the fridge adds is a temperature gap between the slab and your kitchen air, and every time you close that gap you get condensation on the surface. That moisture dissolves the outer layer of sugar, which then recrystallises as a dull white haze and turns the candy canes tacky. The only time I'd reach for the fridge is a short 15 minute firming stint in a kitchen that's genuinely too warm to set at all. Recipe Timing Prep: 15 minutes Cook (melting): 10 minutes Rest: 55 minutes (10 minute partial set between layers, plus 45 minute final set) Total: 1 hour 20 minutes <a id="recipe-card"></a>”
Allergen Notice: This recipe contains milk (both chocolates) and usually soy (soy lecithin is a standard emulsifier in most chocolate). Candy canes are typically gluten-free, but many are produced on shared lines with wheat or nut products, so the packaging is the only reliable source on that. For a soy-free version, look for chocolate emulsified with sunflower lecithin instead. Ingredient formulations change without notice, so read current labels rather than treating this list as a guarantee for any specific allergy.
Frequently Asked Questions
Recipe Card & Steps
Ingredients Checklist
Click an item to check it off as you prep
- 12 (340g) dark or semisweet chocolate, chopped into pea-sized pieces
- 12 (340g) white chocolate (cocoa butter listed on the label), chopped into pea-sized pieces
- 1 oil-based peppermint flavouring (optional)
- 5 standard candy canes (about 1/2 cup / 60g crushed)
Step-by-Step Instructions
Follow along and mark each step complete as you cook
Line a quarter sheet pan or 9x13 inch pan with parchment, leaving an overhang on two sides.
Unwrap the candy canes, seal them in a zip-top bag, wrap the bag in a towel, and crush with a rolling pin until you have a mix of fine powder and pea-sized shards. Set 2 tablespoons of shards aside.
Microwave the dark chocolate at 50% power in 30 second bursts, stirring between each. Stop when about 70% has melted, then stir off the heat for 1 minute until smooth. Keep it under 115°F.
Pour into the pan and spread to about 1/8 inch thick with an offset spatula. Tap the pan once on the counter.
Rest at room temperature about 10 minutes, until the surface feels cool and leaves no smudge but is still slightly tacky to the touch. Do not refrigerate.
Microwave the white chocolate at 50% power in 20 second bursts, stirring frequently. Stop early and stir smooth, keeping it under 105°F. Stir in the peppermint oil if using.
Pour over the dark layer and spread quickly to the edges.
Scatter all the crushed candy cane over the wet surface, finishing with the reserved shards. Press down lightly with the flat of your hand or a sheet of parchment to anchor them.
Set at cool room temperature about 45 minutes, until matte and firm throughout.
Lift out by the parchment and break into shards by hand, or score with a warm dry knife for even pieces.
Recipe Card Notes & Tips
You Might Also Enjoy
More delicious kitchen-tested dishes in Desserts.